My Facebook account was hacked, banned then disabled. Removing me from the only 2 platforms I use. There is no hope for recovering them. So I am back on my personal blog page over the next few weeks I am going to try to upload my project posts in order from both Facebook and Instagram. I don’t know if i will Be able to back date them or if it will be just a dump of posts.
Hang on and get ready for the ride!
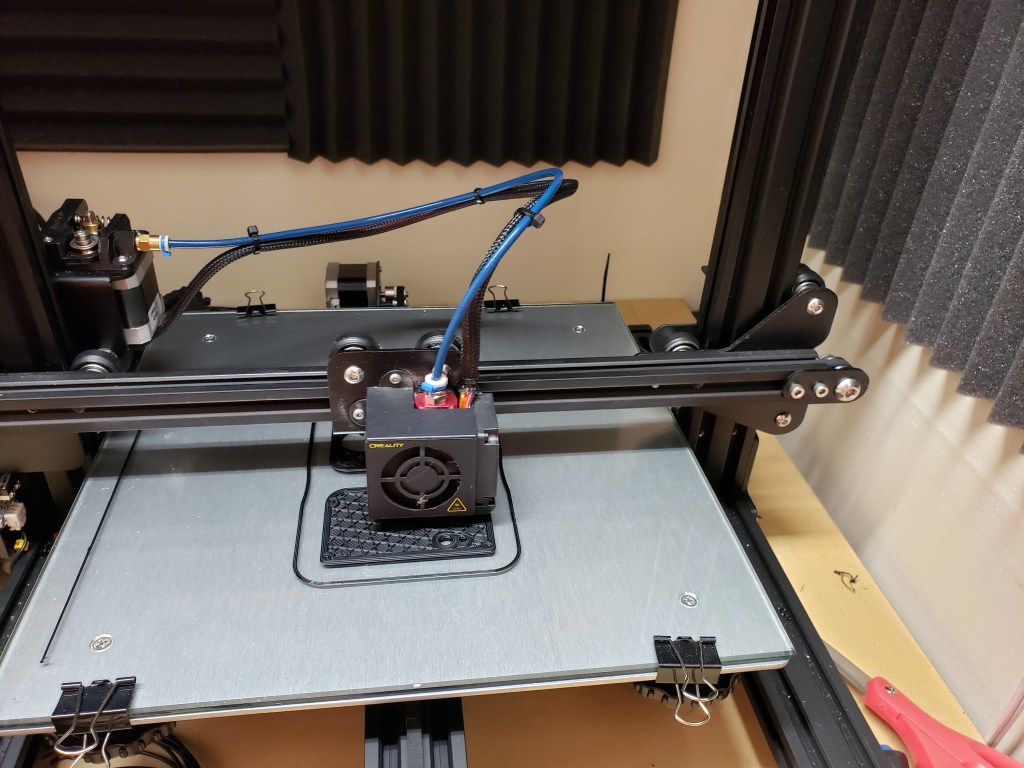
7000 Lumen bike light build. (Part 1)
Last year I successfully made a 1000 lumen head lamp for use while riding. I also attempted to build a 3000 lumen handle bar mounted light using Cree XML-2 Leds. That light was a failure it lasted for about a half hour till it over heated and died.
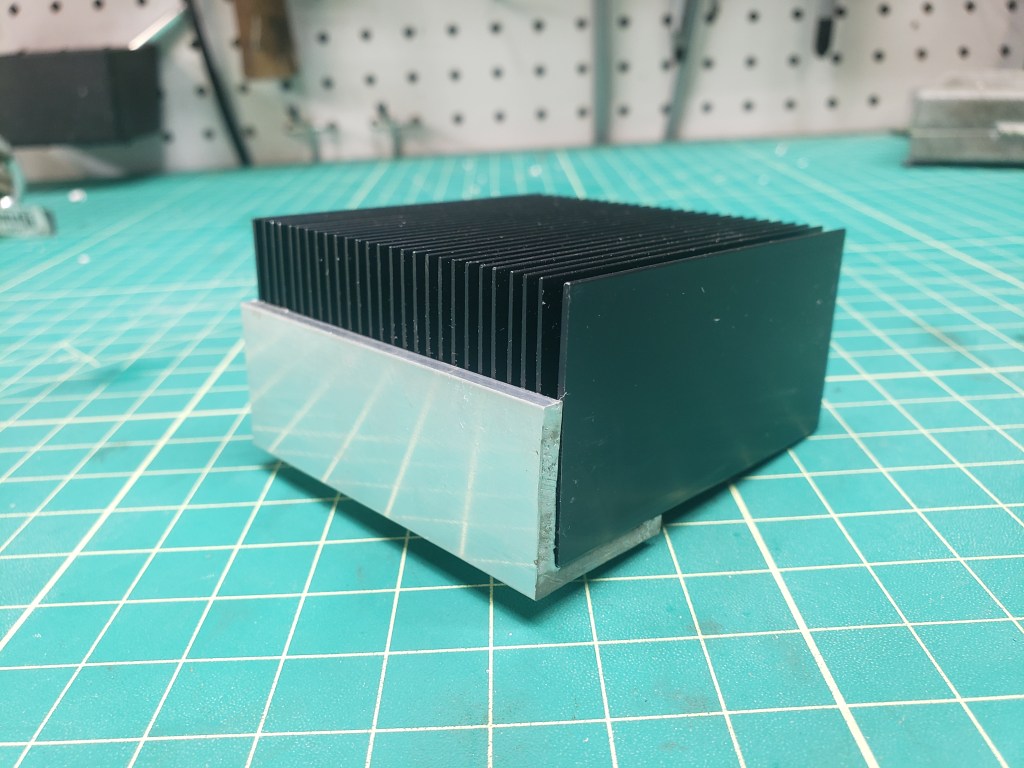
This time I’m starting by sizing the heat sink properly instead of modifying a cheap ebay light. Before I get ahead of myself. I’m going to be using cree XHP 50.2 leds this time since the have a light output of 2500 lumens and only draw 1500 mA. Thus I won’t need quite such a massive heat sink. To drive the Lights I’m going to use TaskLED’s HB Flex driver. This board offers many options. Including a mode specifically for bikes. And I’m going to use calcio medium spot optics.
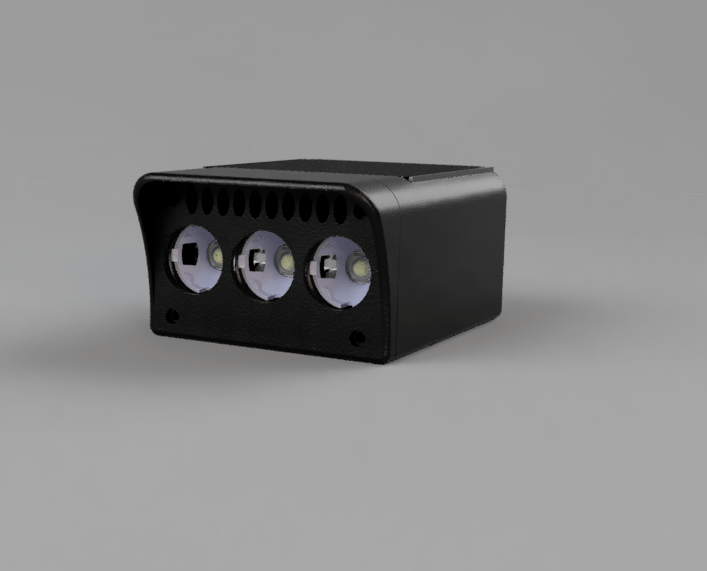
After deciding on the components. I started the 3D modeling process. Using Fusion 360 I started by sourcing models of the components and modeling what I could not find. To find the models I use grab-cad or go directly to the manufactures website. From There I just started modeling some people say its better to start with a sketch but I prefer just to go off the design in my head.
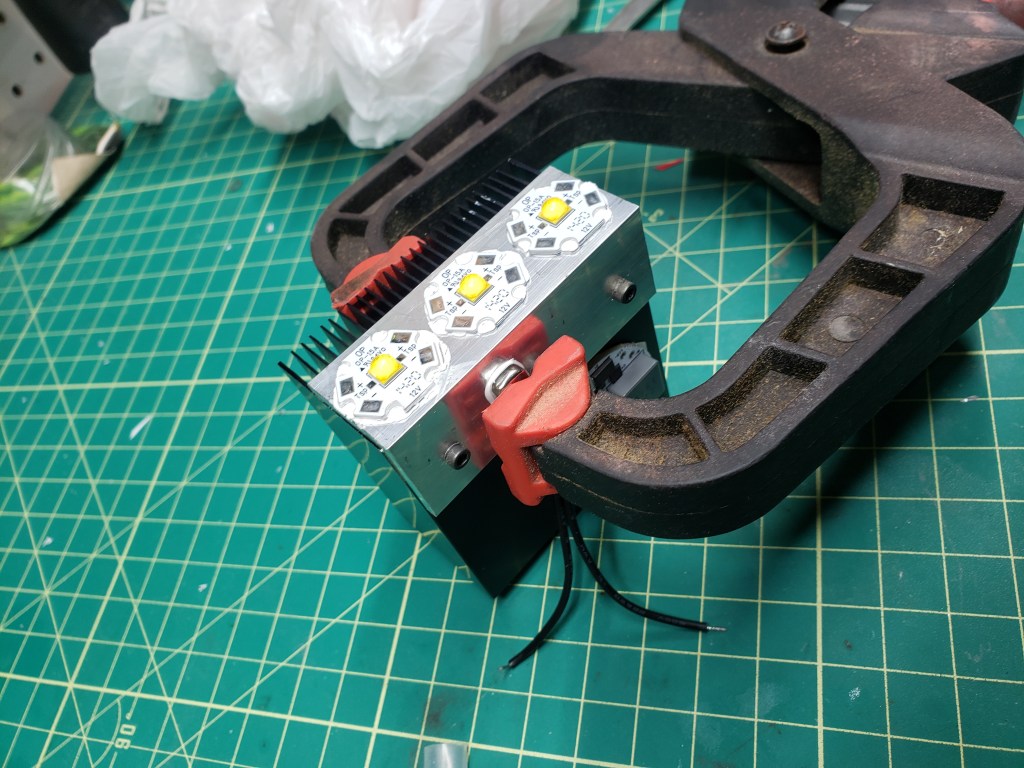
On to the build process I First mounted the LEDs using thermal epoxy and a KSD9700 100 degree thermal switch in order to prevent me from frying the LEDs again. The Thermal switch was not necessary since the drivers offers thermal overload protection but I would rather be safe. After the epoxy fully dried the driver was mounted and the wiring commenced.
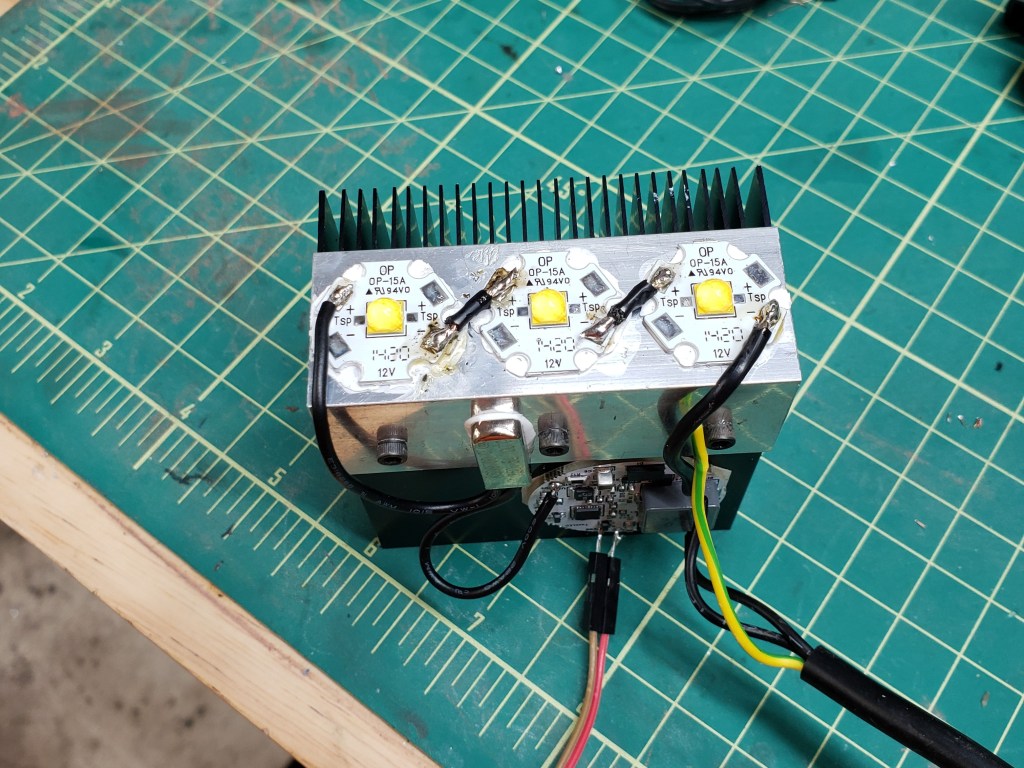
This proved to be difficult since I was using way to large of wire. I was using 18 AWG I only needed 22 AWG. After powering it on I put the driver into bike mode and found out immediately that I was locked out of the menu system. Which meant contacting the manufacture and getting a replacement. Turns out there was a bug in his most recent firmware that caused the problem.
While waiting on the replacement printing of the case started. After printing the case I drilled and tapped holes for the case to mount to and test fitted everything without the driver. There was problems with the depth of the stand offs and a problem with the holes for the front to bolt on. After redesigning and printing the case again there was no problems.
at this point I still have not received the replacement driver So this is where I’m going to end this post here.
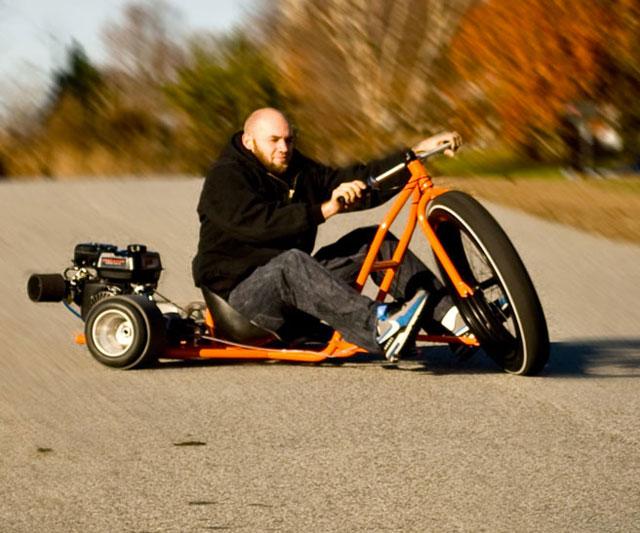
Drift Trike After the Build log part 1 ( introduction)

The drift trike an amazingly fun looking machine. It all started Christmas of 2017 were my uncle showed me a video of people ripping around on a drift trike they built. He proceeded to say he would like to build one. That set my intrest in motion.
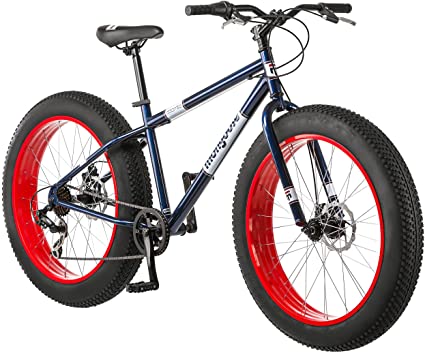
From there I idly researched what bike I can take the parts for and how I would build it. I had found the mongoose massif or dolomite would be the perfect choice. For parts I found BMI karts and Gopowersports I bookmarked them to come back to.
After almost a year of searching to find the perfect bike. I found it a Mongoose Dolomite for a reasonable price in November of 2018.
After getting the donor bike the design and fabrication process started. The first step was to disassemble and take a ton of measurements of the bike. From those measurements I created a 3d model.
Fusion 360 is my preferred and is what I used to make the model. I designed the frame. Using grab cad and McMastercarr to get all the miscellaneous compent models.
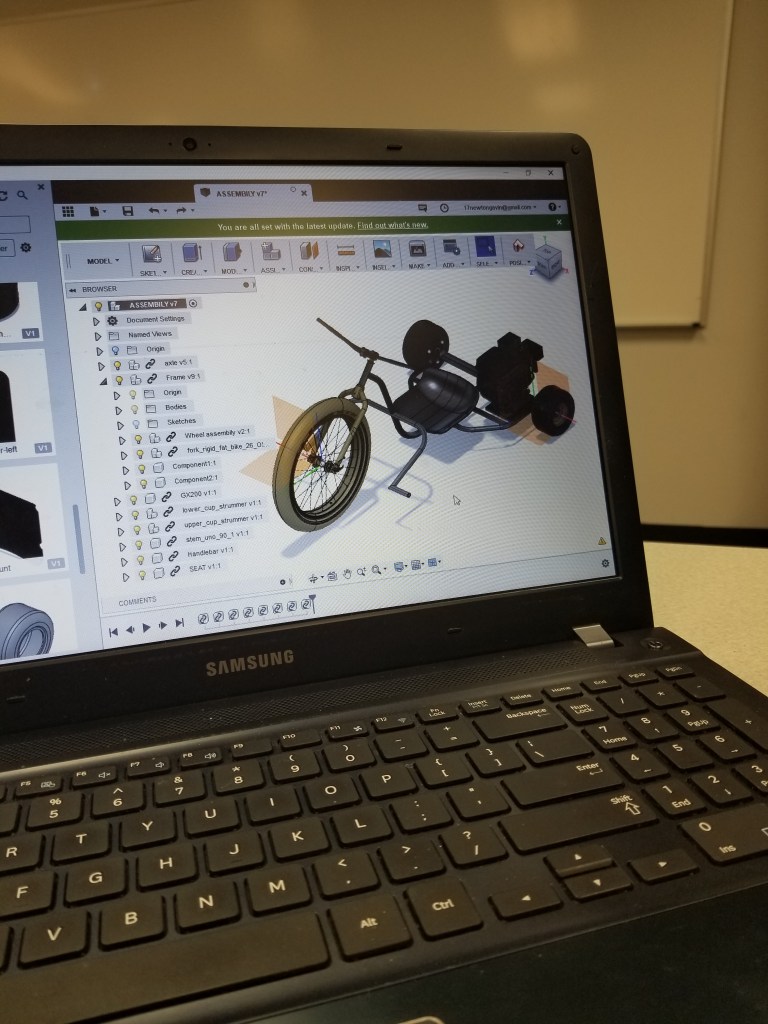
After the design was done. It was time to locate the metal. I special ordered the rear axle housing online. The down tube I had trouble finding a suitable peice until I dug an old hammock stand out of a friend’s backyard I used a chunk of that. For everything else I used black iron piping. Maybe not the best choice but it worked.
In the next post I will cover the build process and the hurdles I had to go over.
27.5 Plus: Part 2 Mullet bike.
First off this post is going to be light on pictures. I’m just getting the hang of making a record. After doing some research about the odd boost 141 hubs that came on the bike. I found that the 148 hubs had the same offset but they were just 6mm wider. The front wheels looked like it would work if the end caps were removed.
Starting with the rear hubs the original plan was to buy endcaps and adapt it that way. On closer inspection that would not work due to the way the axle was setup. after removing the axle I took it to my uncles machine shop and had him take 3mm off of each side. once it was finished I assembled it and found that I had damaged a bearing during disassembly. I temporarily took one from the front wheel. After that hassle it was time to tighten the axle . My lack of cone wrenches made this difficult it took an adjustable and channel lock pliers to eventually get it. The wheel was set in temporarily it fit the offsets appeared right. Great!
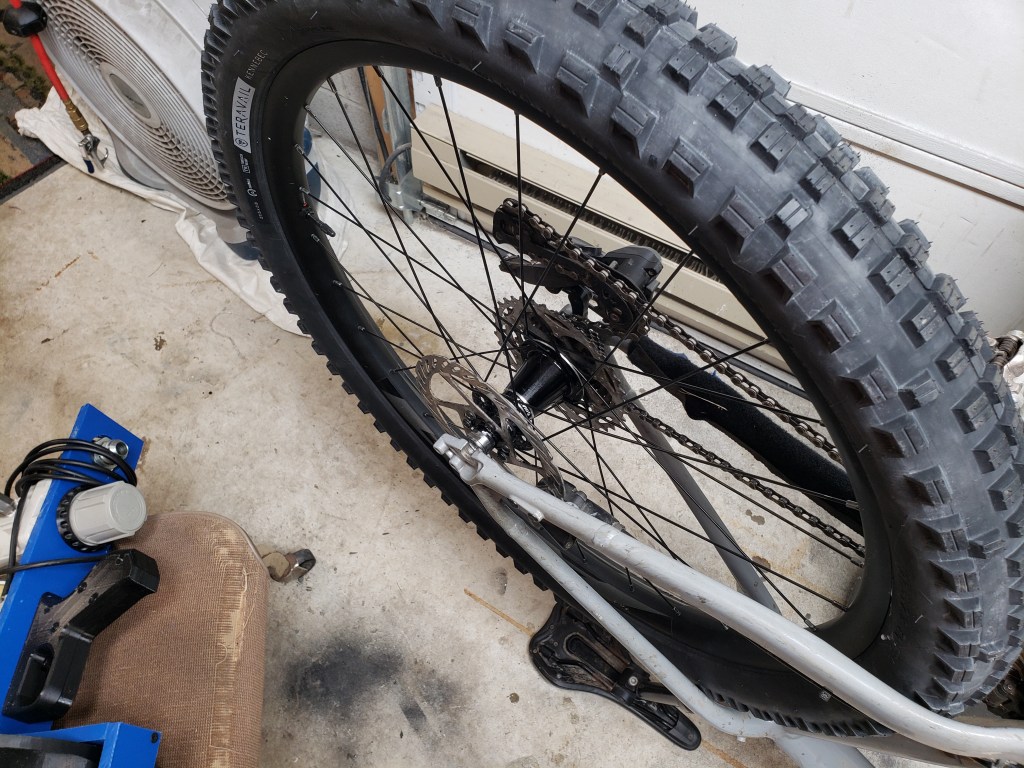
Once the brake rotor and cassete was installed. The alignment of the chain and caliper was checked it all looked good. While I waited for the adapter that would allow me to finish the install of the wheel. It was time to check the fitment of the front wheel.
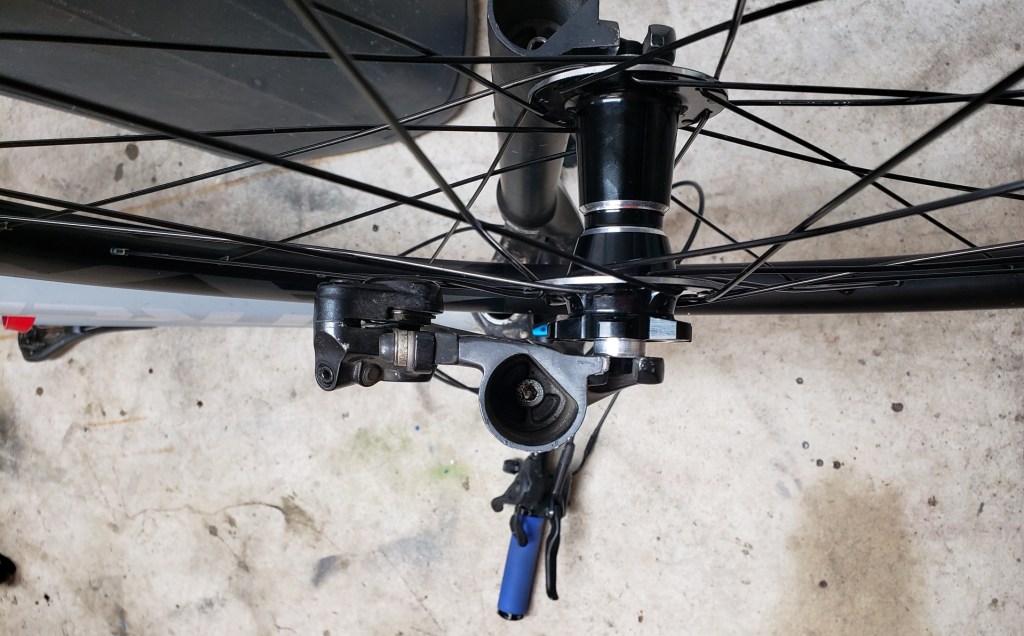
Once the endcaps were taken off it fit between the forks. It was looking promising till I realized the offset of the brake rotor mounting flange was wrong. Meaning there was no way of getting the rotor in place. It is going to have the mullet setup for a while.
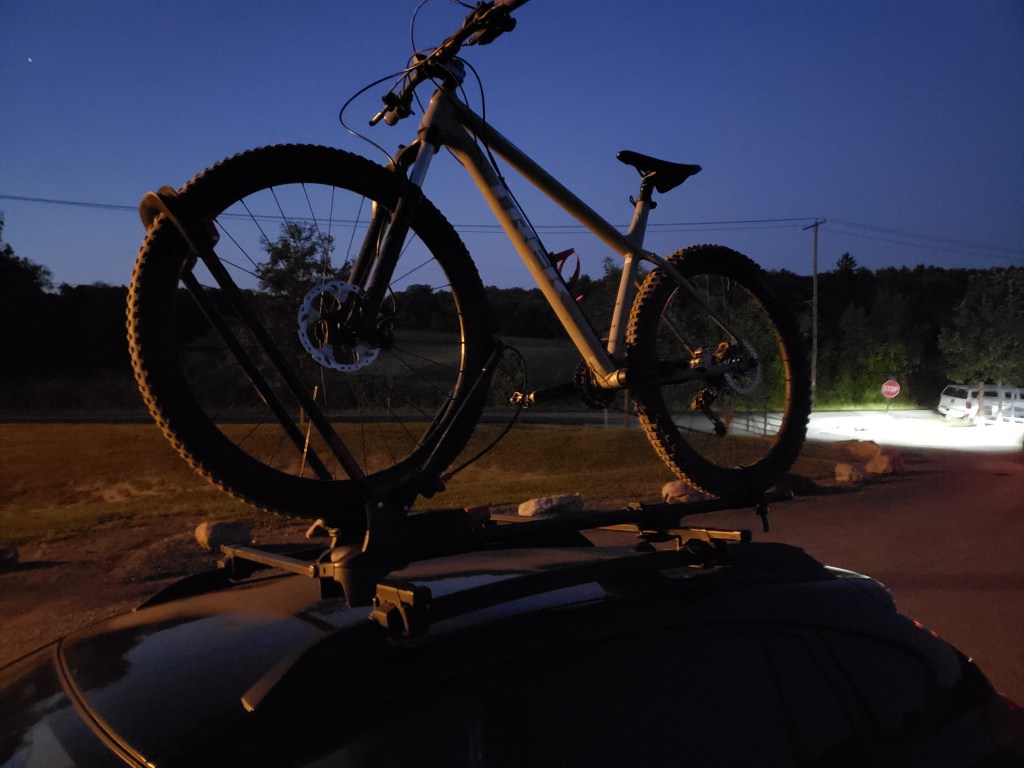
So Monday comes along and the rear axle adapter came in the mail. I got it installed minutes before I had to leave for a ride. Once I hit the trails I did not immediately like the feel of the wheel. Although it had allot of traction it felt slow like it did not roll well and wasn’t as soft as I was expecting. This was at WERP a very mild trail system riding with kids.
The next day I hit Hypsie Gap. this is a much tougher Trail system with allot of techinical and rocky sections. I lowered the tire pressure by 5 psi and left. It Road amazingly it was smooth, fast and had tons of traction. I went through some sections of trail almost 30 seconds faster. The mullet setup is fast although I do notice the tires on the climbs.
cant wait to try a full 27.5 setup!
27.5 Plus: Part 1 getting the wheels.

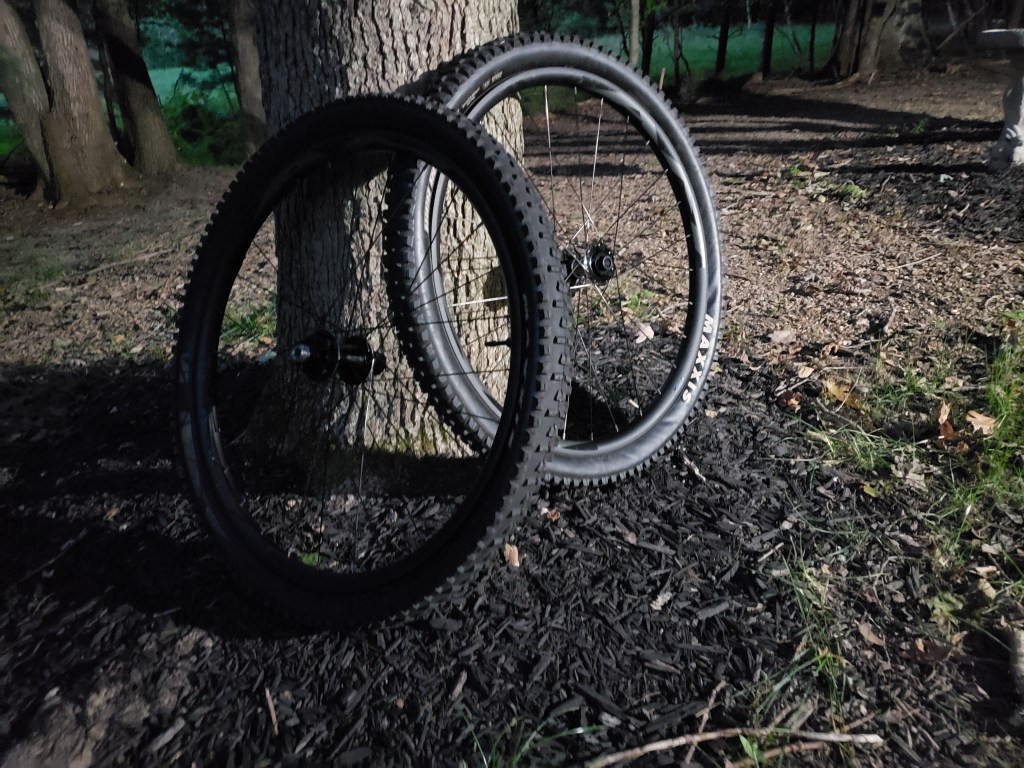
I started this week off going to pick up a Giant XC1 27.5 wheelset. They came with a nice set of maxxis high rollers. Will not be able to use them but they can be sold. Nothing noteworthy happened during the transaction. It was typical we me on time he showed the wheels I paid him and we parted ways. It was when got them home. The realization struck me that the wheels wouldn’t be easy to convert.
The rear wheel has the wrong spacing and looks like it doesnt use sealed bearing. That prevents me from just getting endcaps.The front wheel the spacing is wrong and the axle is too long I will have to get a custom one made.
It might be simple it might not. We find out in the next update.
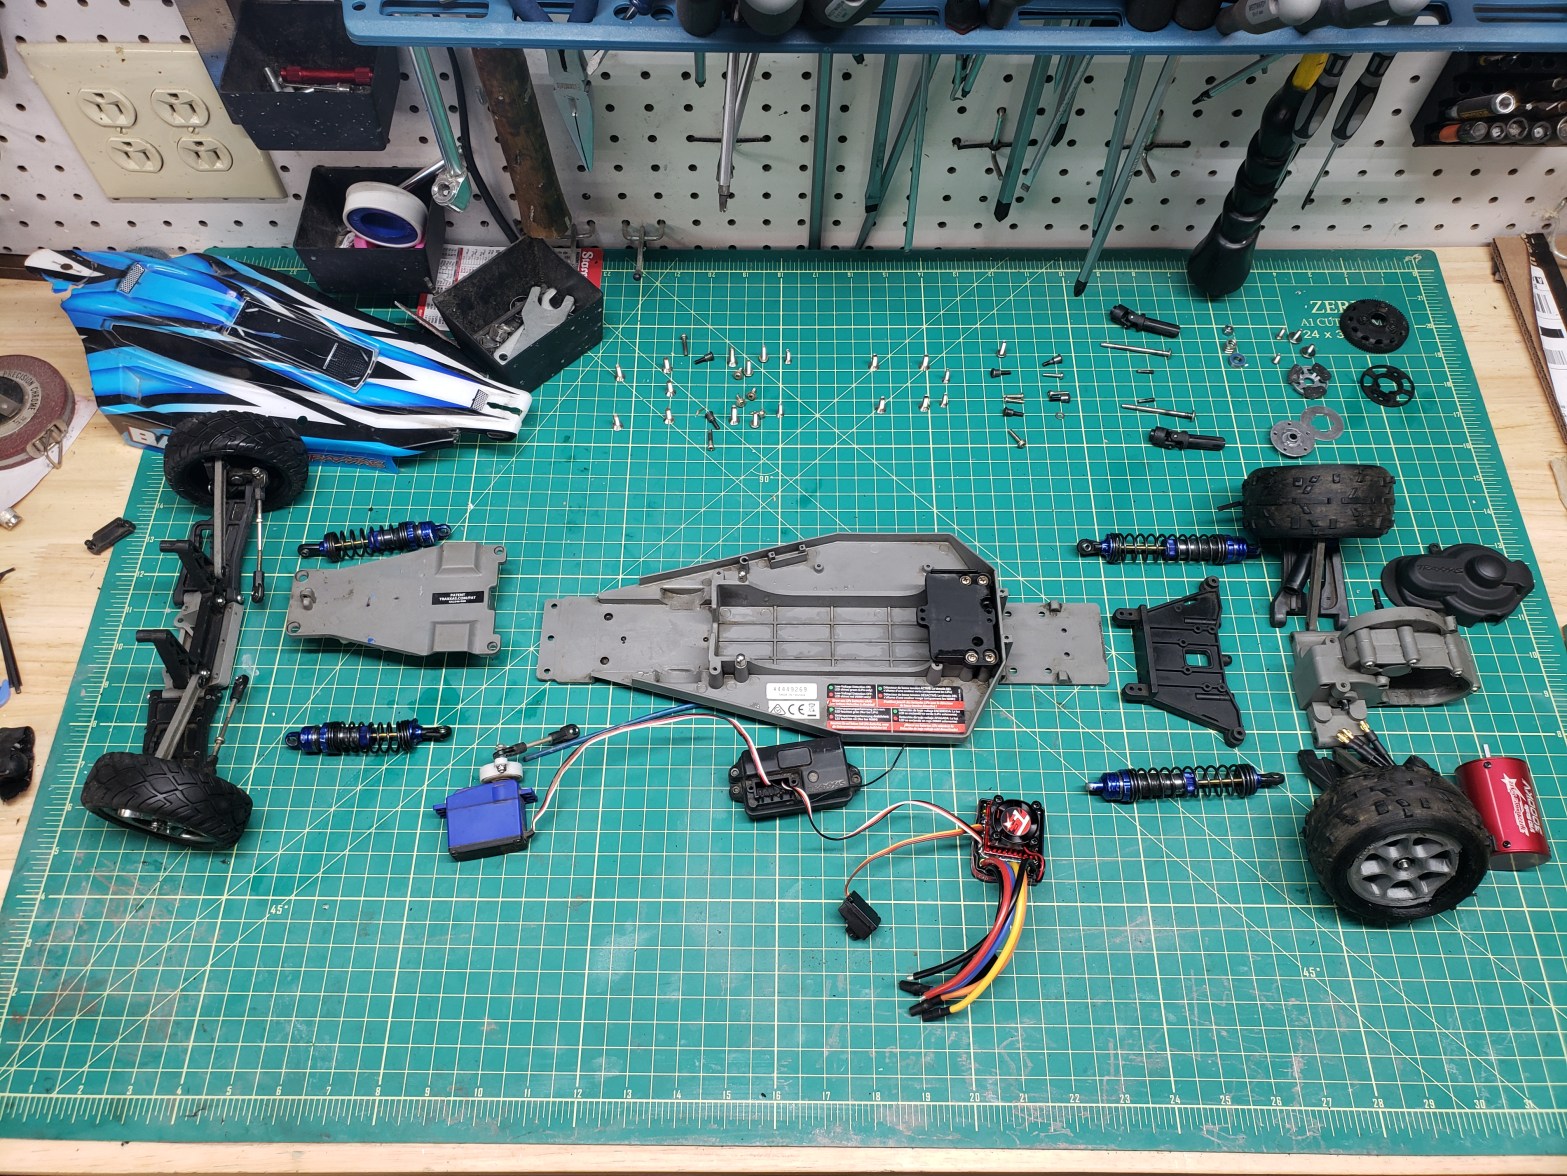
Traxxas Bandit: back together
The assembly process couldn’t have gone much smoother. It was quite relaxing putting it together. Lubricating the pivot points as I went along.
Since I put a new ESC and motor on it. The ESC had to be programmed. I tried the instructions I found online. They just launched the bandit off the workbench After I few more minutes of research I realized the ESC requires the use of a programmer. Bummer it won’t run right without being programed.
Still I gave it a try. Found that the grease did the trick with the clutch. No more one wheel peel. Although it now it turns worse under acceleration. The esc has a lag in it making it annoying to drive.
Over all I am happy with the results. It doesn’t seem any faster or responsive.But I believe it will be better after I programmed it.
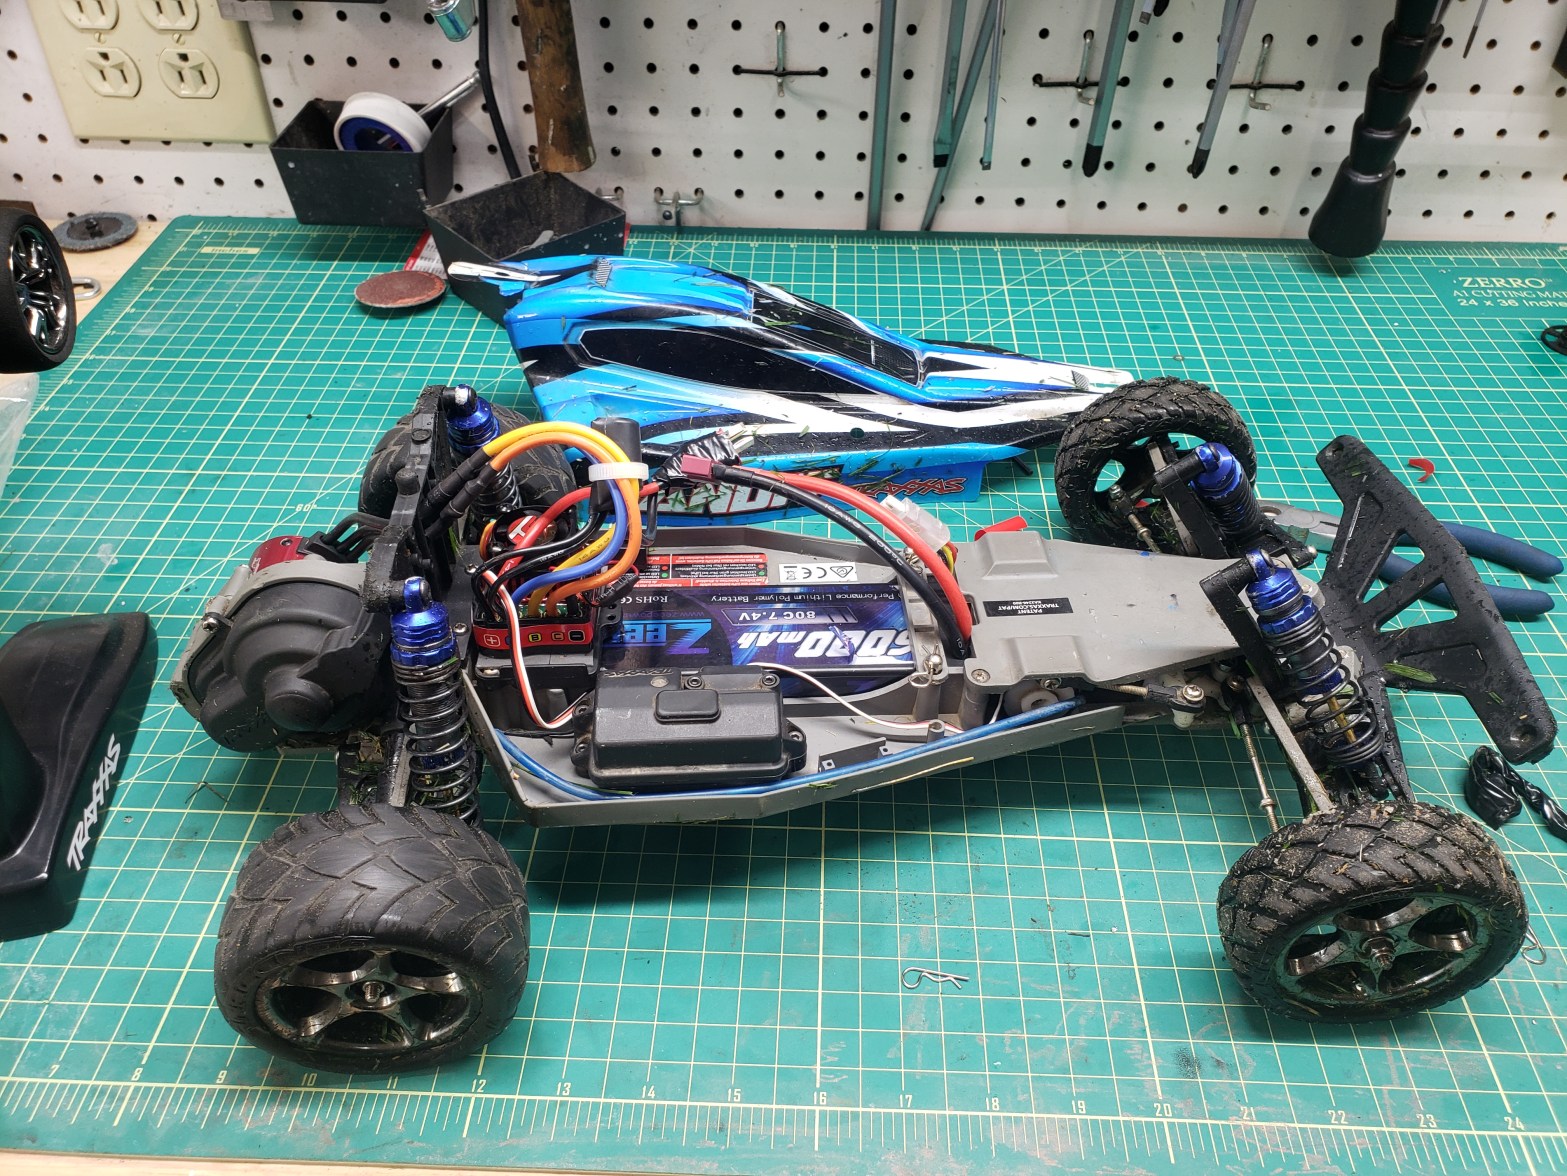
Traxxas Bandit: In Peices
This is what happens when you go a bit too deeply into cleaning and servicing your RC car. I got this bandit about a year ago. It has been bashed hard without many failures. On August 31st that streak ended the motor started smoking then just plain gave up. Within minutes I ordered a brushless replacement it and eagerly waited for it to arrive.
When it arrived a few weeks later. I got to looking at the bandit. I found that it was thrashed. bent and leaking shocks worn bearings wornout driveshafts and it was filthy. Now there are more problems but I am only going to fix the major ones.
The first thing I’m going attempt to fix is the differential (not really broken but going to try and make it better). it has a fully open differential. Causing it to spin only one wheel get stuck way more often than I would like.
To remedy this problem I cleaned out the differential then filled it with a mixture of seatpost grease (it has glass particles in it) and regular grease. This will hopefully add friction and act as a limited slip differential. Failure is always possible time will tell if this will become a problem.
I also repaired the shocks and slipper clutch. First I straightened the bent shaft of the shock. Then proceeded to clean and refill them with a thin grease. The slipper clutch was getting a bit polished and grooved. This was not causing a problem at the moment but I figured it would in the future. I took the clutch and sanded the maiting surfaces using 1000 grit on a peice of glass to remove the polish and any groves.
It is now time for reassembly. Expect an udate in a few days when I get it back together. That’s all for now.
Why I’m here.
First off my name is Gavin Newton. I am currently a maitance electrician at Altium Packaging.
I’m hoping with this site. I will be able to keep track of my hobbies/projects and share them with the world. Some of my hobbies include biking (as well as many other outdoor activities), photography, fabrication, electronics, 3d printing and cars.
I’m going to have project logs set up. This will allow you to view individual project updates. I dont expect to be on a schedule. I plan on just updating whenever I get the chance. So come along and see what I get involved in.
